Many industrial machines signal their status using stack lights. They are simple technology and make it super easy to see machine status at a glance. Especially on a production floor full of machines, stack lights allow quickly gauging where attention is needed.
So naturally, I wanted to augment my 3d-printer with such a stack light, to see what it is up to, without walking over. And I want to show you how you can do it too, while also sharing some stack light lore.
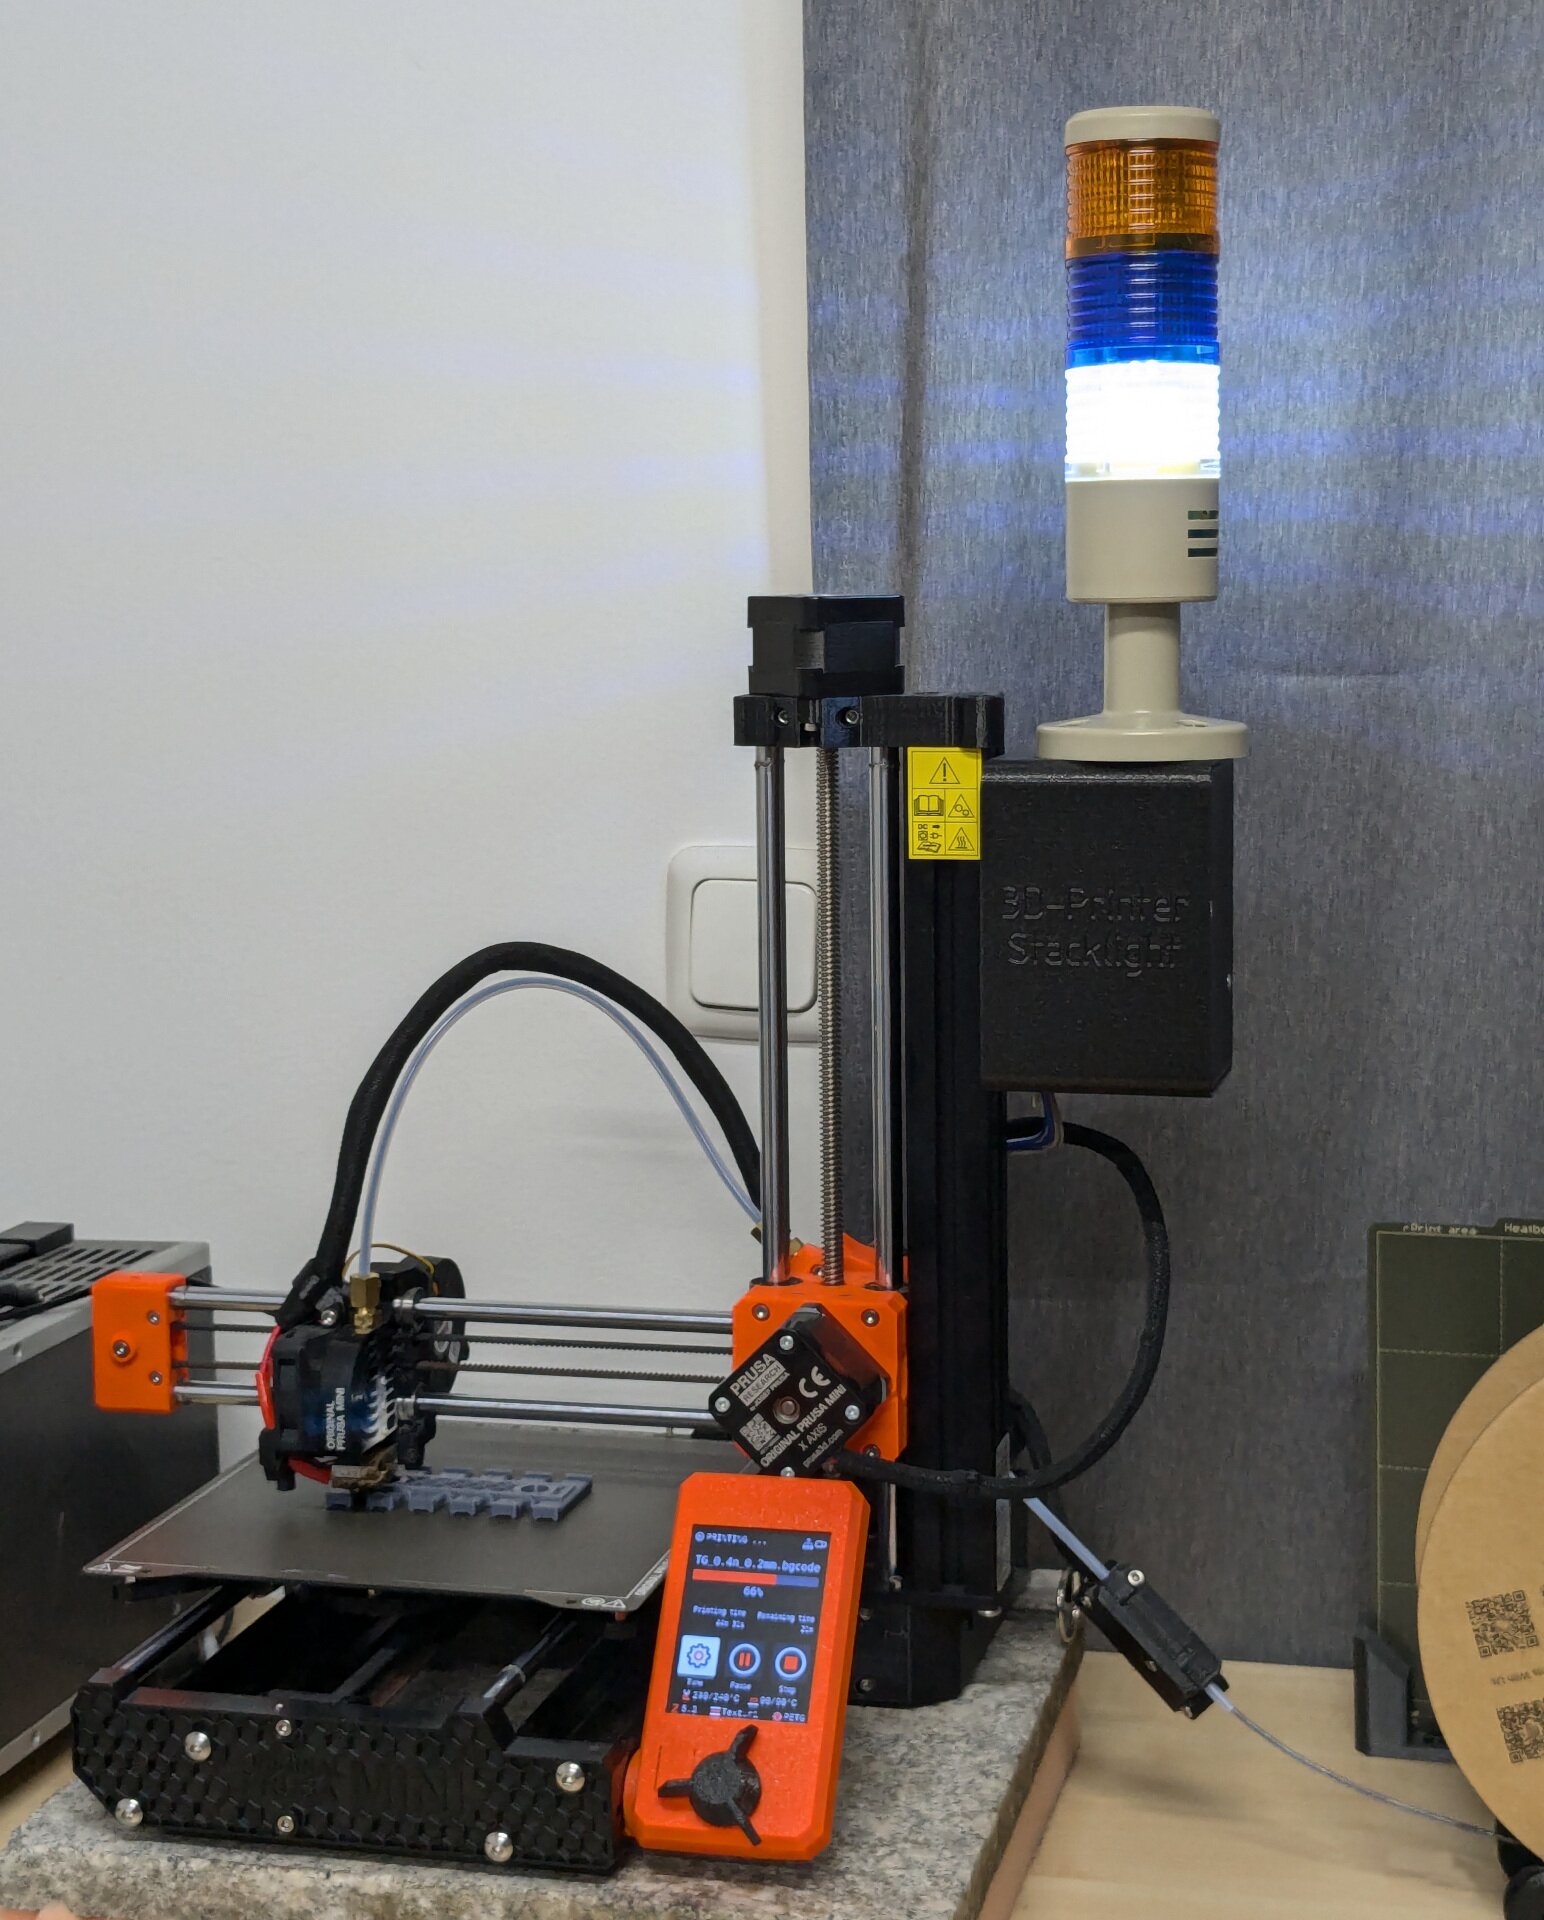
In typical online recipe fashion, let's start with lots of boring lore — the tutorial will follow at the bottom. Sorry, not sorry :)
Lore
Stack lights emerged from yet another ingenious invention from Toyota, as part of their efforts to optimize the production processes. It is called an andon (Wikipedia) and it describes a system that notifies relevant stakeholders of problems on the production floor.
While the andon was originally designed for humans, the idea lived on as more and more automated equipment entered the production floor. It was very important to quickly notice when machines were no longer operating normally, so problems could be resolved without much delay.
The stack light quickly became a popular tool for this as it doesn't require any complex systems and it quickly allows getting an overview over a production floor in a very visual way. Any problem immediately attracts attention by an odd color sticking out from the rest.
Stack Light Colors
Color? Well, the colors of a stack light are my favorite topic! Many stack lights follow the simple traffic light pattern of red, yellow, and green. Some more complex ones also include a blue and a white section.
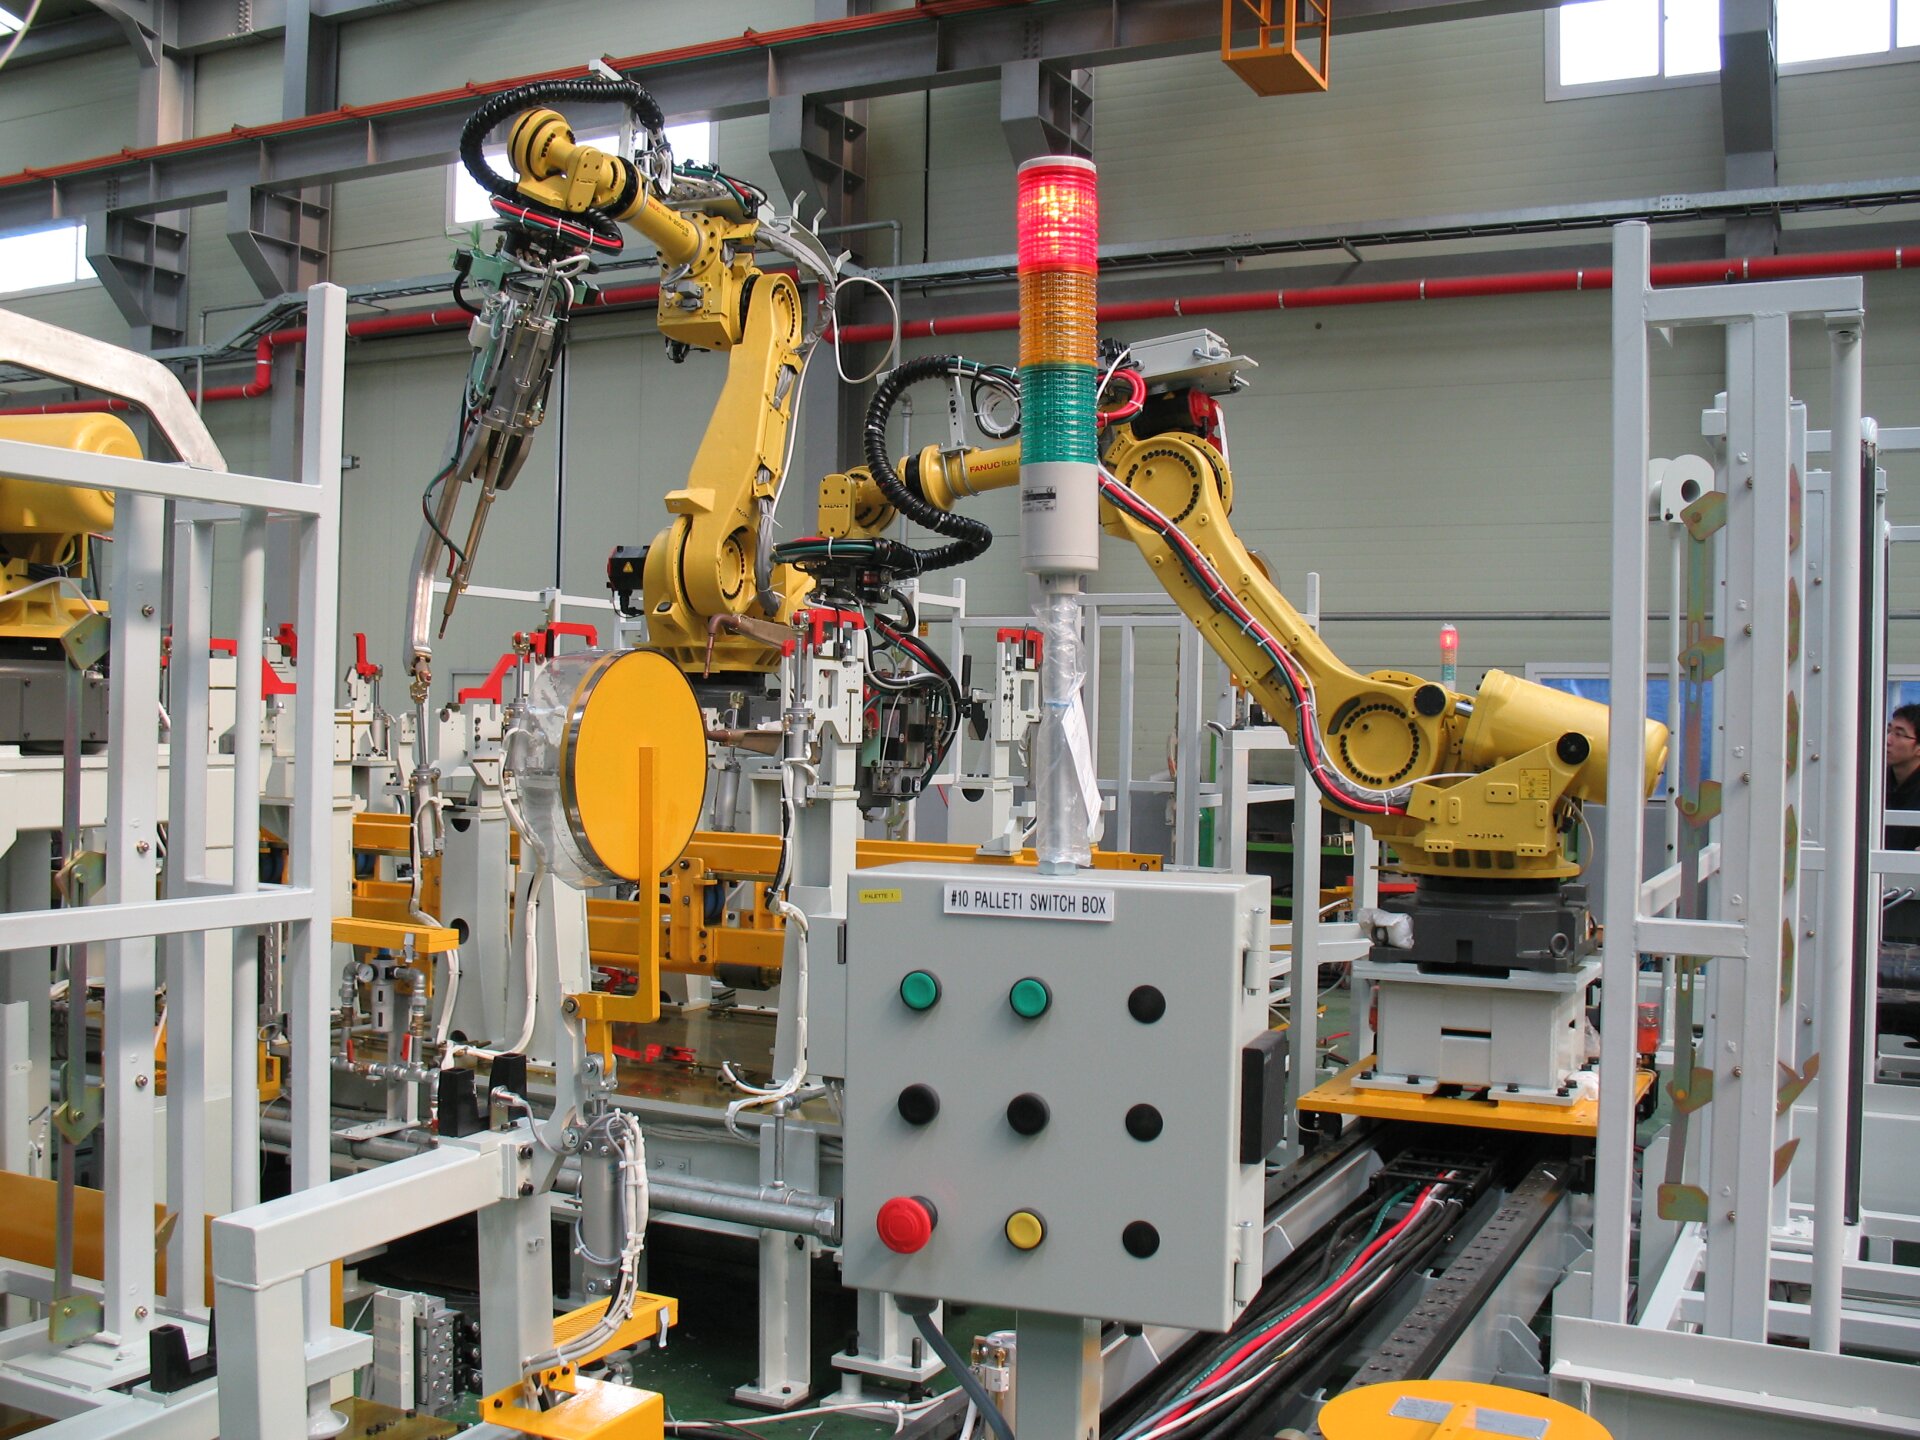
A traditional red/yellow/green stack light on a robot spot-welding cell.
Mixabest, CC BY-SA 3.0, via Wikimedia Commons
Each color of a stack light shall have a meaning associated with it. Of course it is very important that this meaning is unambiguous. And here, we encounter an interesting problem: The meaning of the traffic light colors are actually not well defined!
- On the street, a green light means you are allowed to cross the road, the situation is safe. A red light means the traffic is busy and you shall stop.
- But on many other systems, a green light means "ok" — the machine is running normally. A red light means the machine is stopped.
At first, this just looks like potential for confusion. But it can quickly develop into a safety hazard: Imagine a stack light next to an entrance into a machine. When it is green, the machine is running, but an operator might mistake the green light as an invitation to enter. You can imagine the rest...
Because this problem cannot be resolved universally, many parts of the industry have been steadily moving away from using red and green for status indication. Instead, very different colors are used, where such ambiguity does not exist.
I personally like the yellow, blue, white scheme the best. It works like this:
- Yellow/Orange: Indicator for abnormal situations or fault conditions
- Blue: Indicator for an operator action being required
- White: Indicator for normal operation

For lack of a better picture, here is my 3d-printer again, with the yellow/blue/white stack light scheme.
The idea here is something like this:
- White, being the most neutral color, is used for the most common situation. During normal operation, no attention should be drawn by the machine, so a white light represents this best.
- Blue is already associated with required action, as for example mandatory instruction signs following ISO 7010 (Wikipedia) use blue color.
- Lastly, yellow is used instead of red because it is also tied to abnormal situations and the requirement to raise awareness, but without any connotation of a traffic light.
Interestingly, some places which use this scheme do have traditional red/green stack lights as well. But they are only used in the traffic light meaning, to give instructions to people on whether access to a certain area is currently safe or not. This way it is completely unambiguous and there is (hopefully) no room for confusion.
Prusa Mini+ Stacklight
Alright, so now let's put a stack light on a 3d-printer. I have a Prusa MINI+, so the design I am going to show is custom-tailored to this specific printer. Something similar should be possible for other printers, but you'll have to adjust the specifics.
In this blog post I will mostly give an overview of the project. More detailed build instructions can be found on the Printables Project Page.
Hardware Integration
The most important question is how the stack light can know what state the printer is in. I decided to get this info from the printer directly, via an expansion connector on the controller board. This has the benefit that it is a printer-local solution.
Another option would have been to scrape the printer status from its web interface, but this would need network integration and thus come with its own set of headaches. However, a network based solution is probably easier to set up, if you want to do this.
The expansion connector of the Prusa Mini+ has two GPIO pins and an I2C bus. Originally I intended to use the GPIOs for simplicity, but unfortunately, Prusa is not intending to support access to those GPIOs anytime soon.
So I went with the I2C bus and designed a small board with an I2C port expander and a few relays to switch the stack light segments. I specifically wanted mechanical relays over transistor outputs to get that small, but noticeable, audible cue that something has changed state.
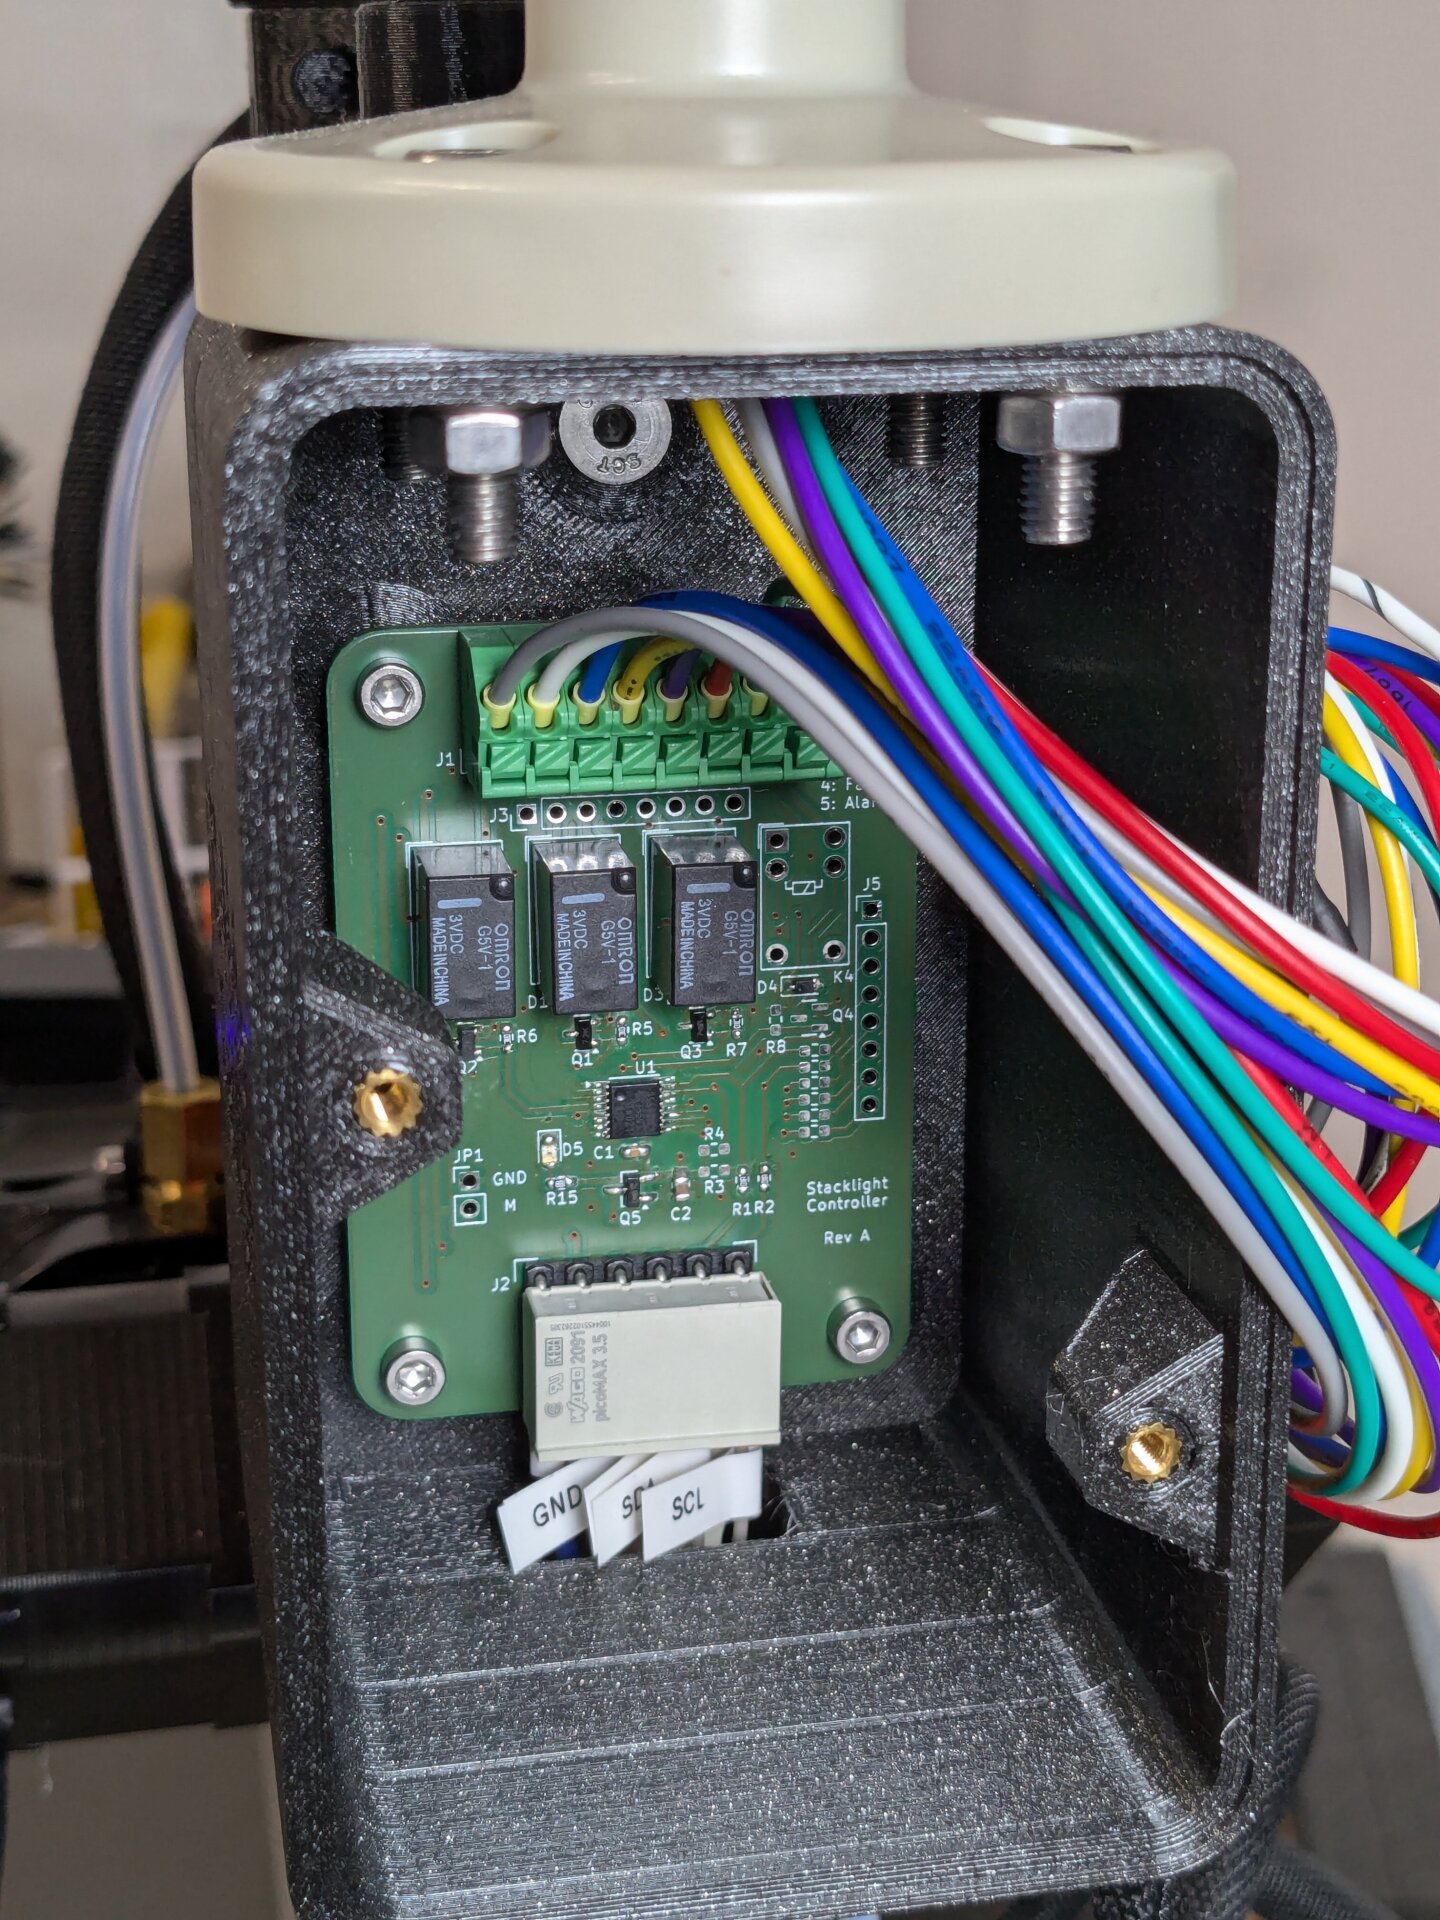
The Stacklight Controller board that bridges between the the Prusa Mini+ and the stack light.
Below you can see the schematic of the board. The design files are all available for download from the project page on Printables.
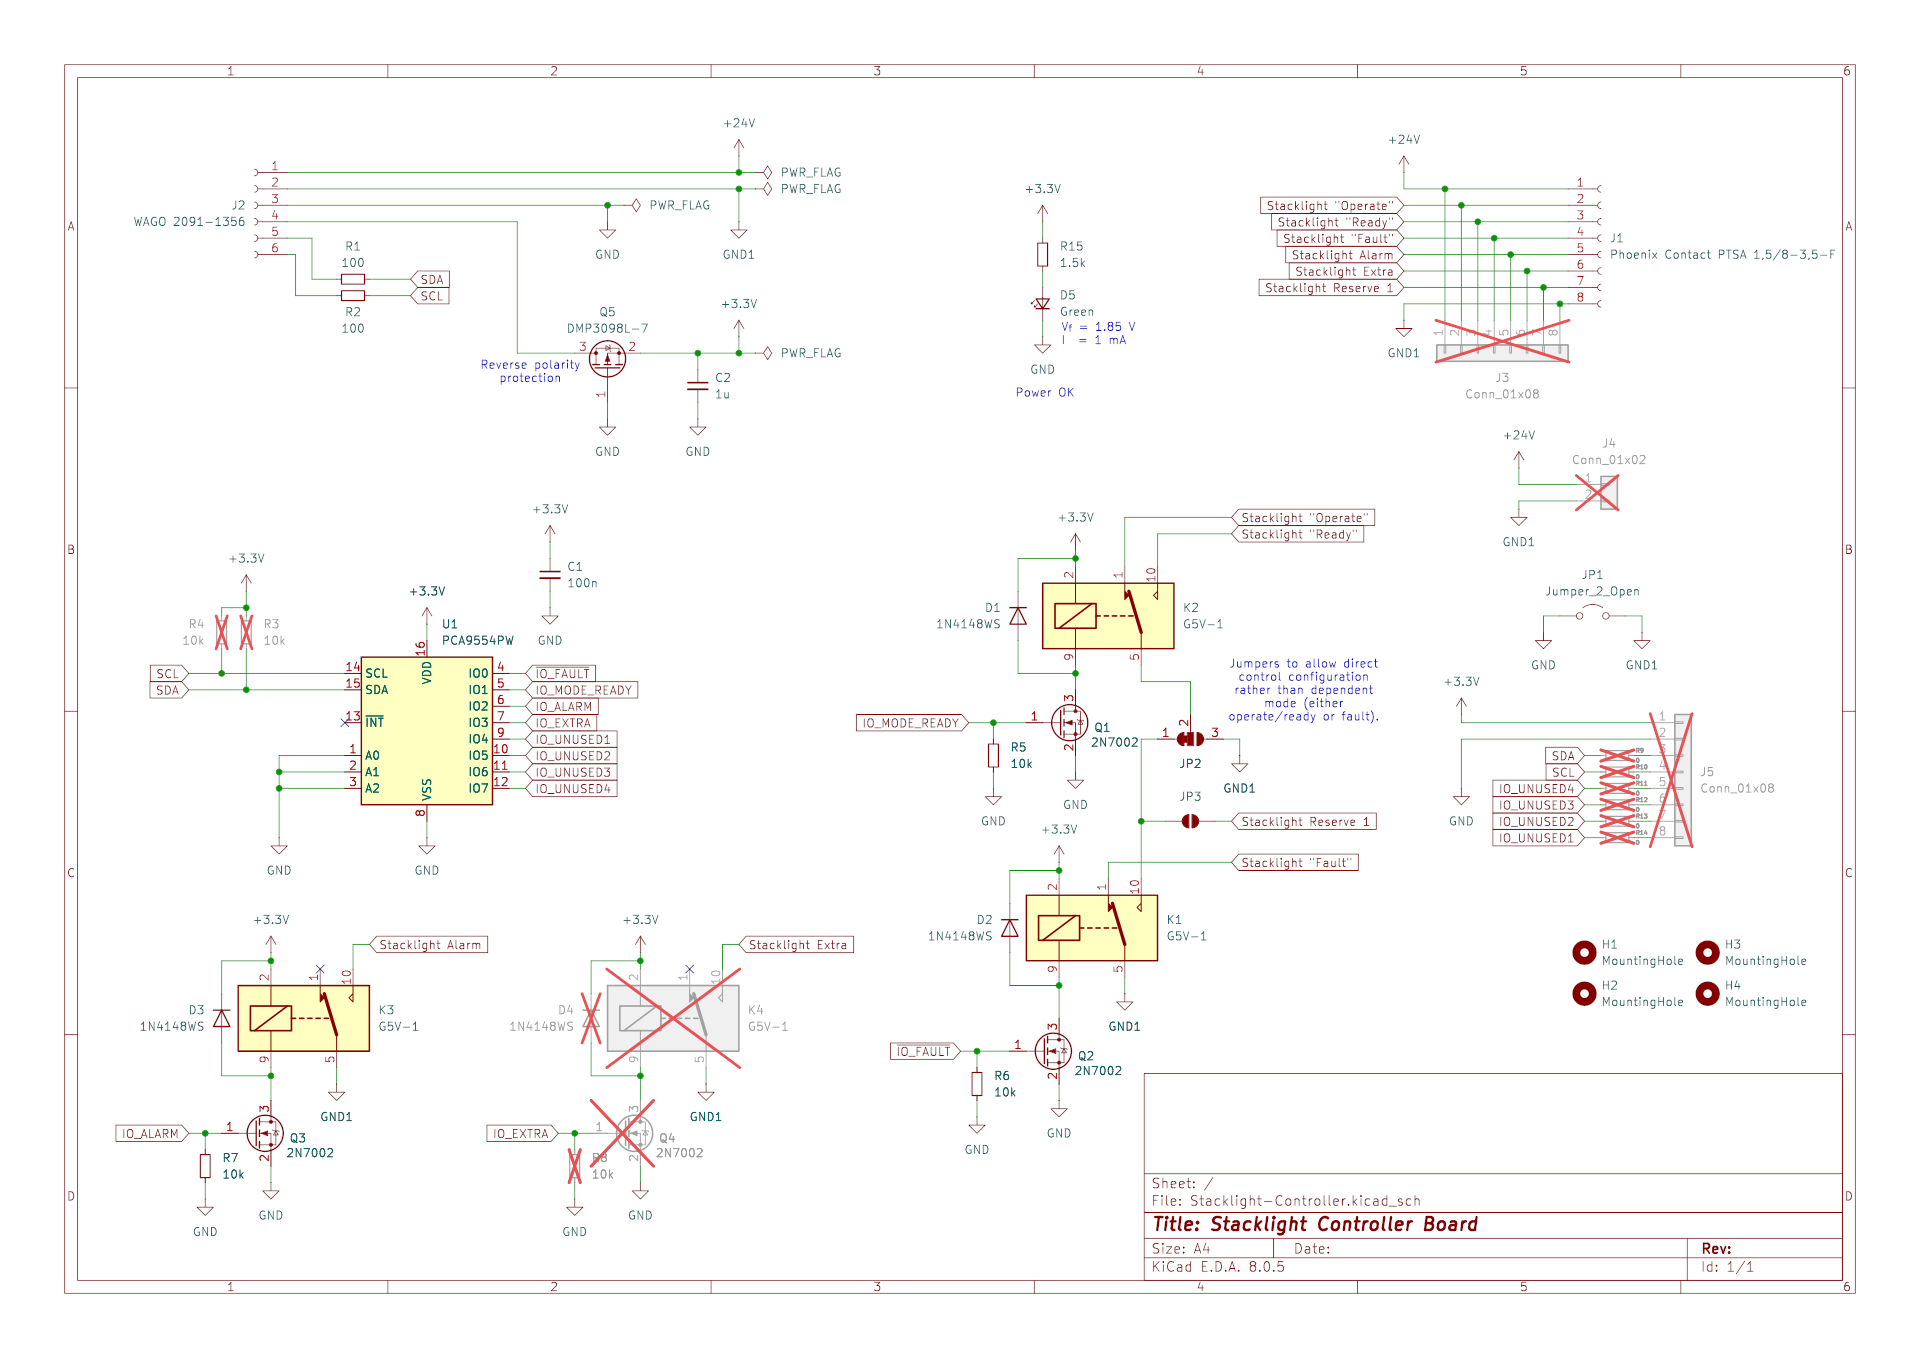
24V Power & Wiring
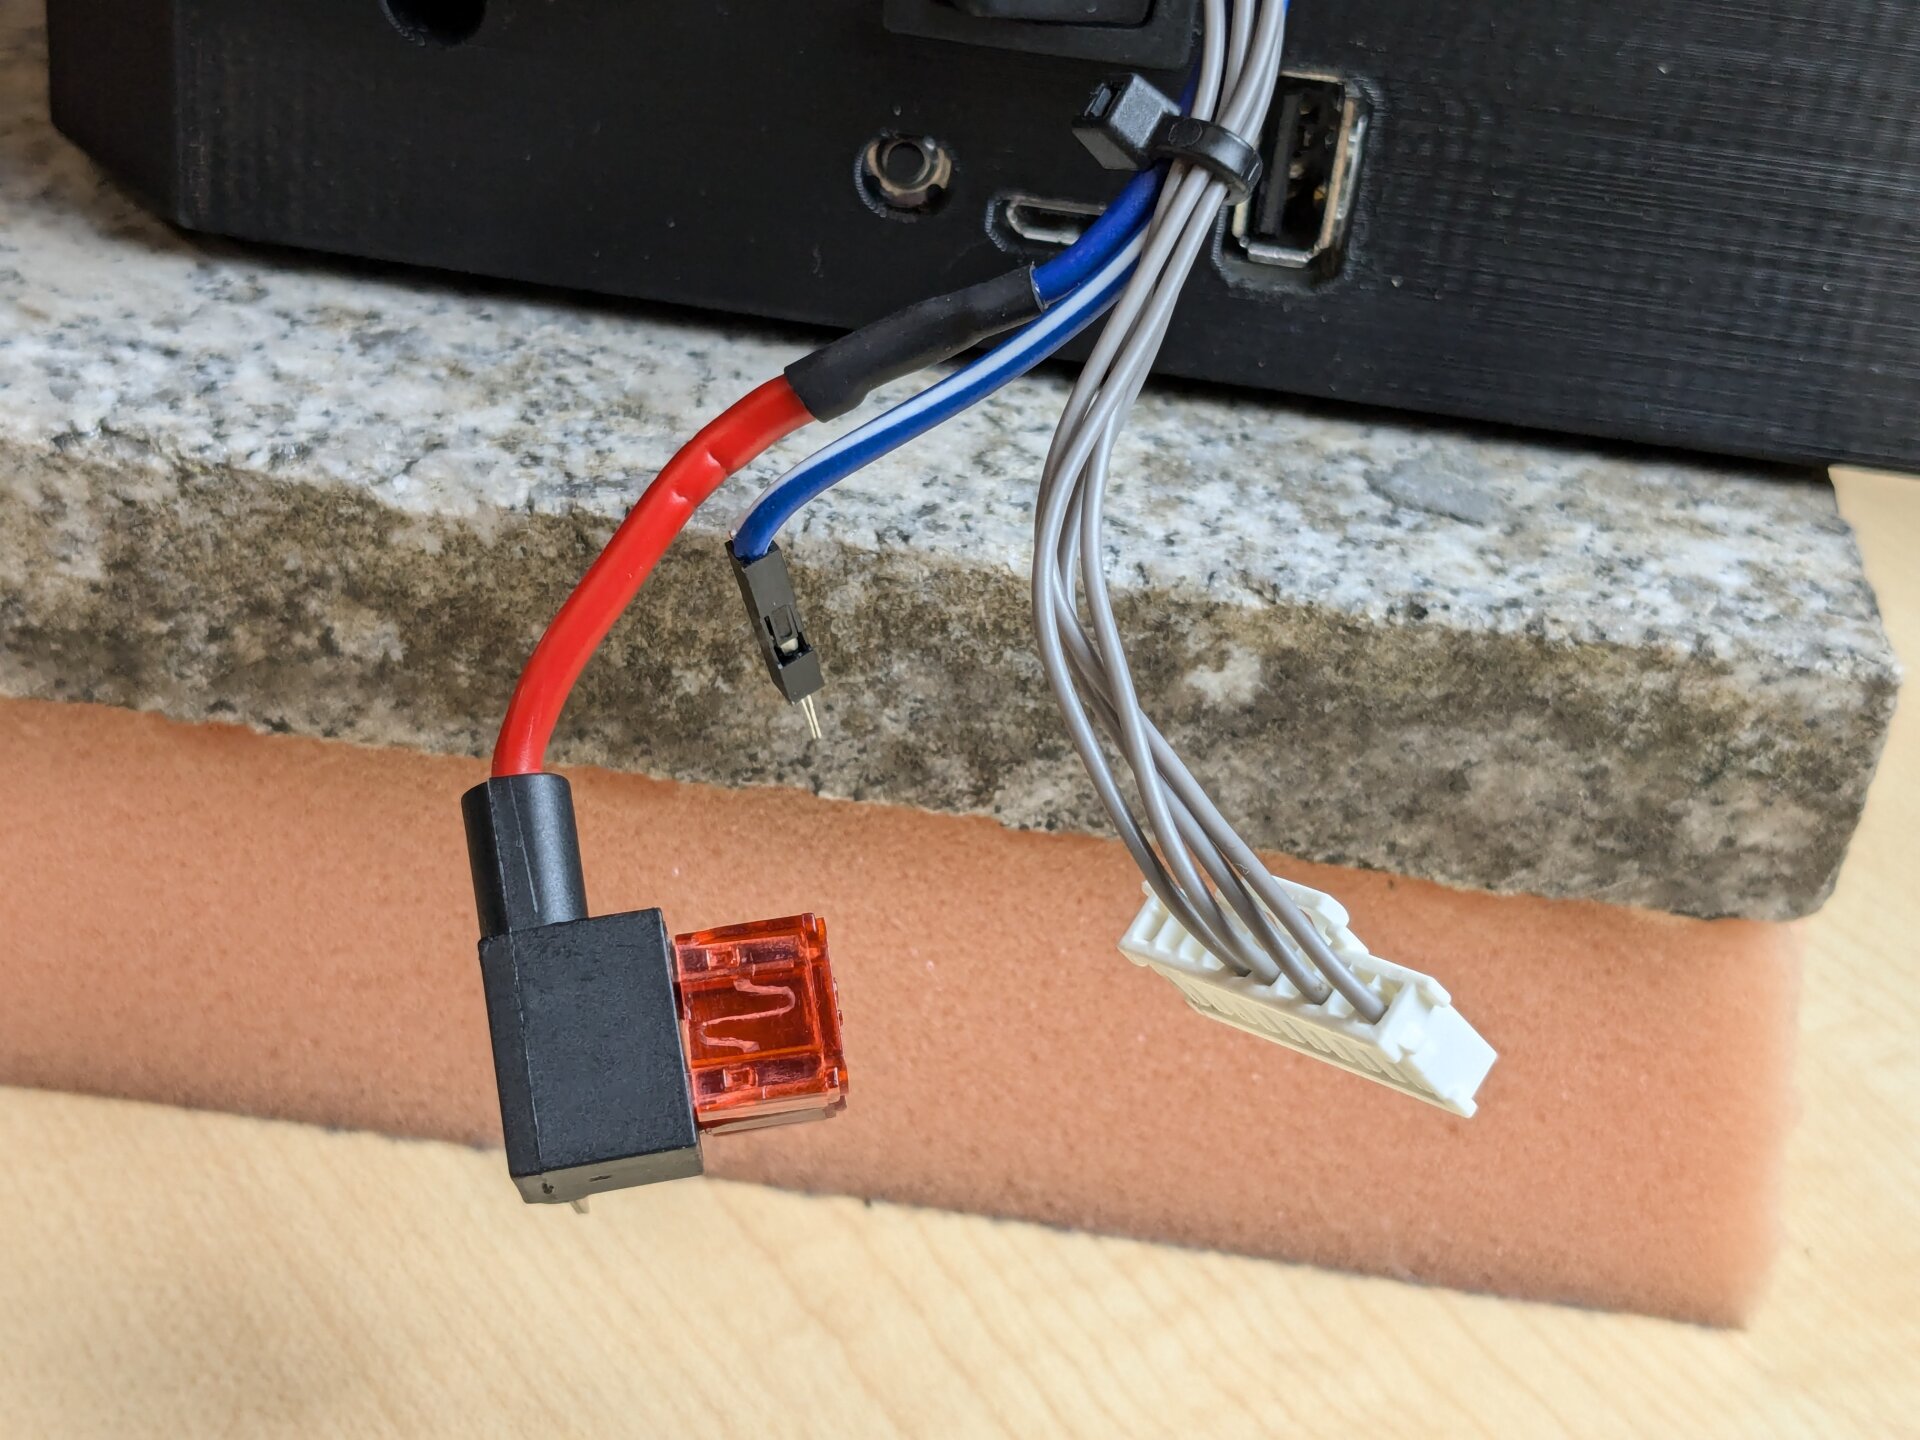
Grabbing 24V DC power for the stack light is a bit difficult, because the Prusa Mini+ board does not have any additional connector where the 24V are exposed. Luckily, eovnu87435ds figured out a workaround by using an "Automotive Add-On Circuit". Read the full guide on the Prusa Forum.
Between this and the expansion connector, the wiring is stupidly simple. Nonetheless, I made a drawing to make it easy to understand:
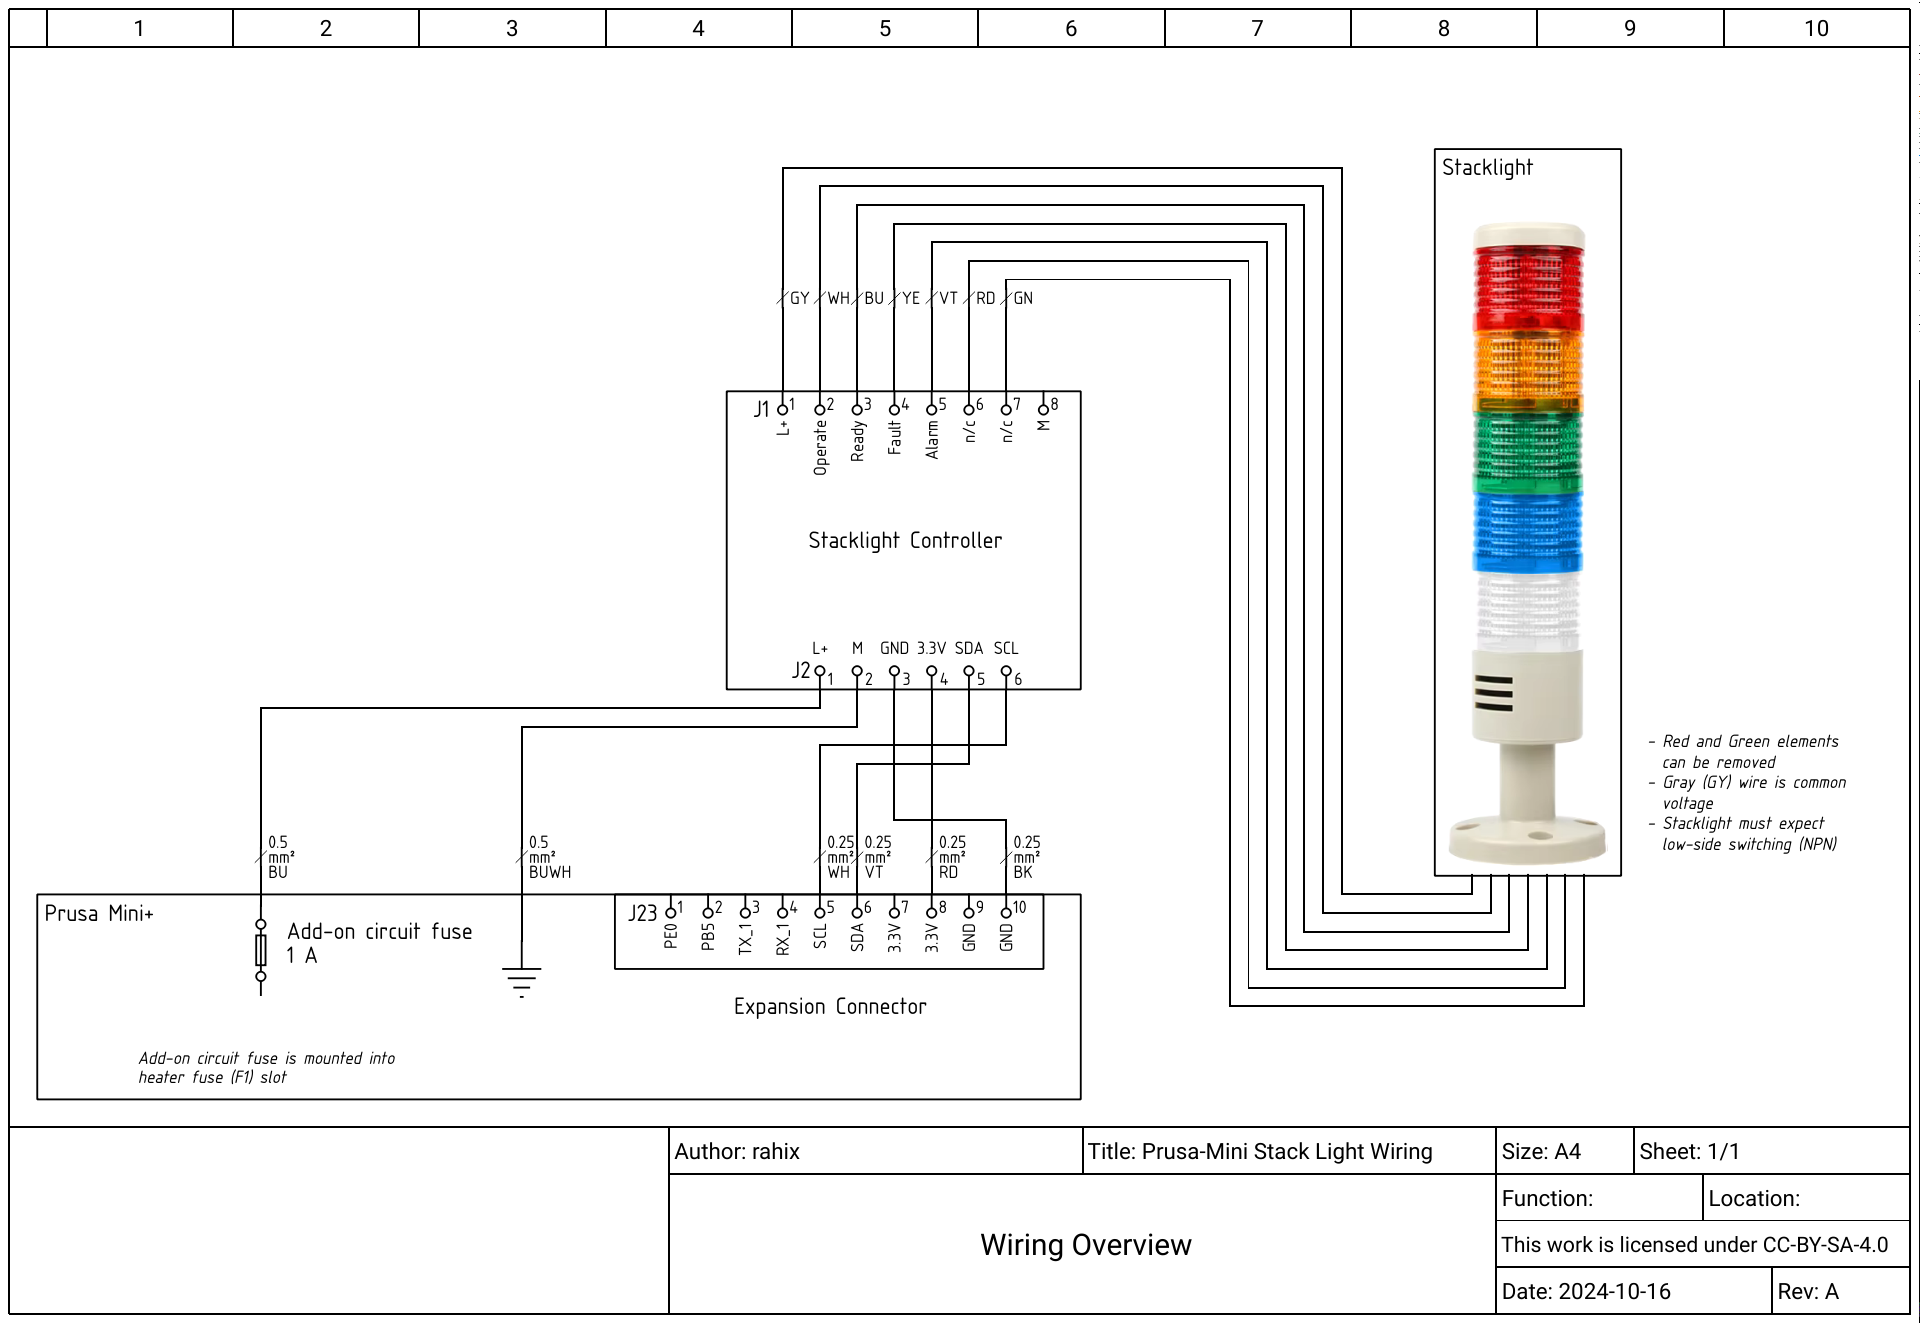
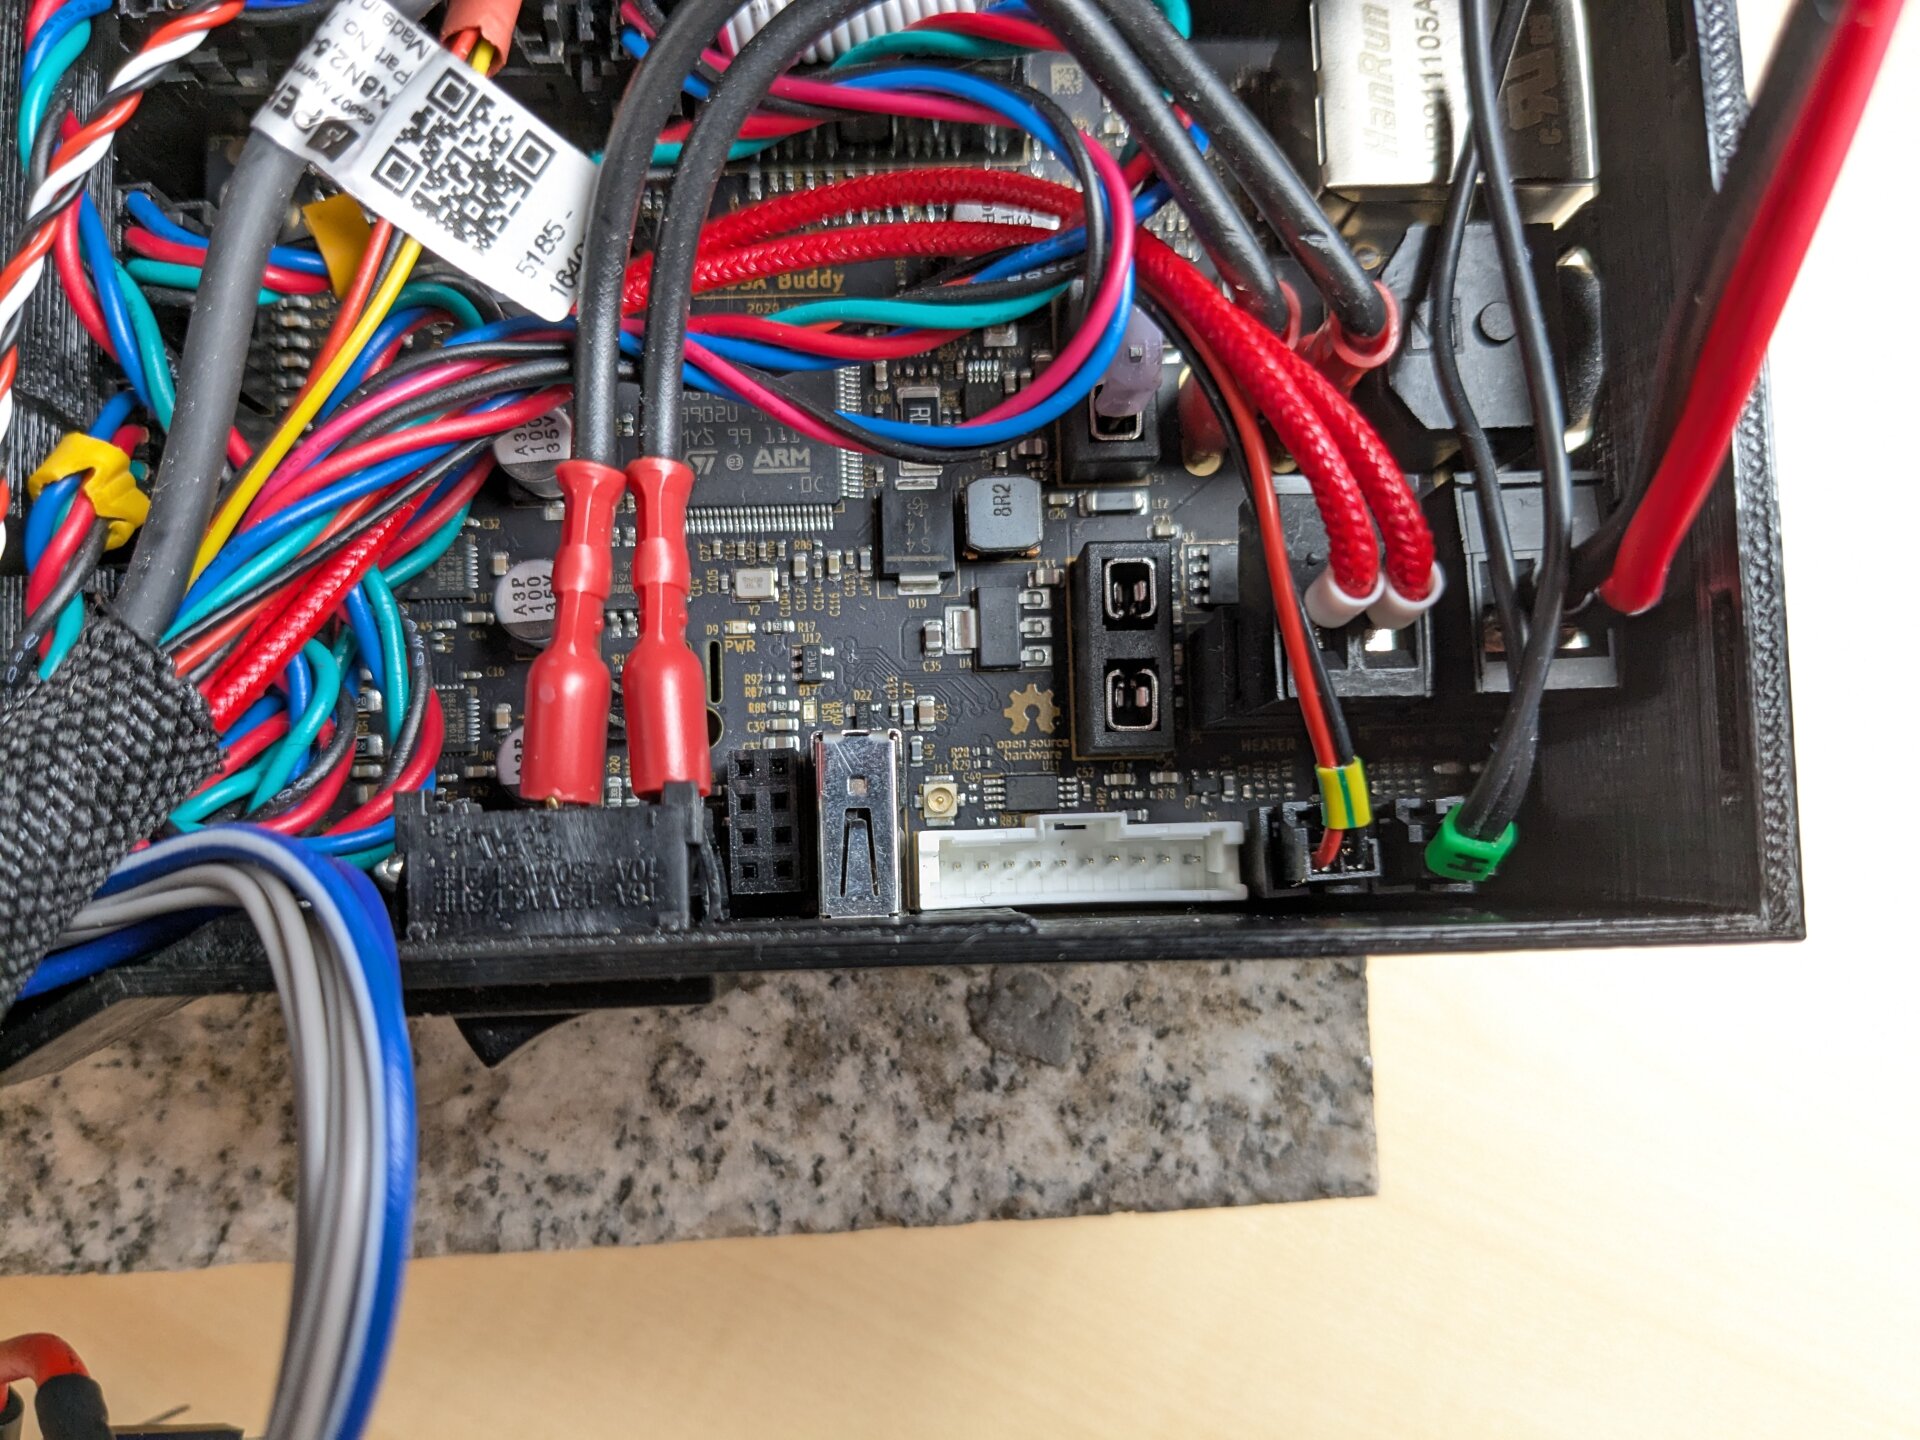
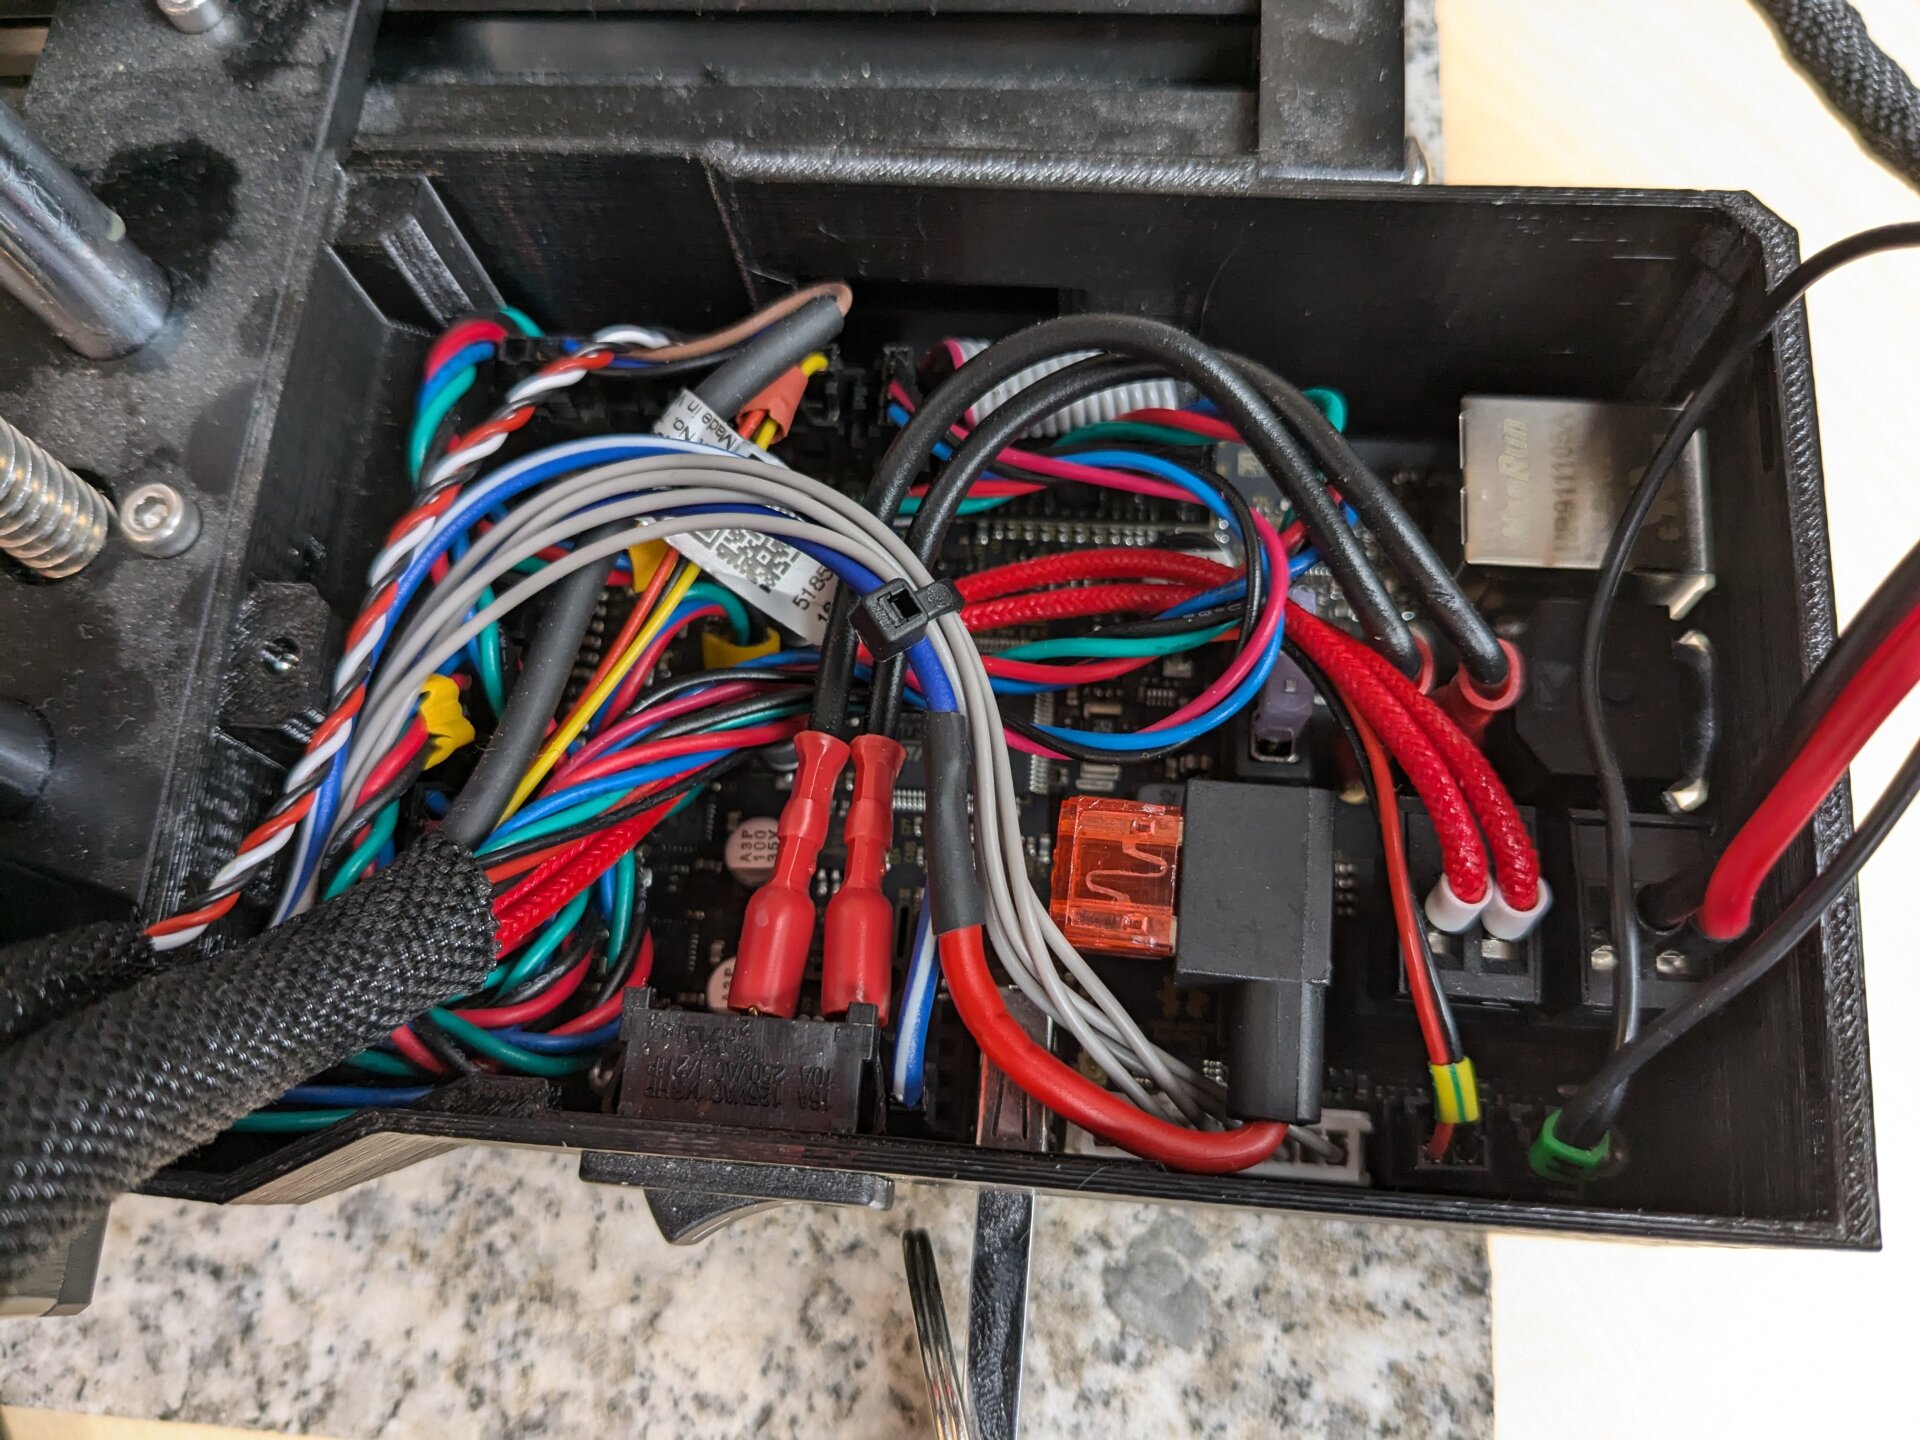
And here are a few pictures of the harness connecting to the Prusa MINI+ control board:
Software Integration
I specifically wanted a solution for controlling the stack light that does not require custom firmware. The main motivation here is the fact that custom firmware makes any updates a headache. You can no longer simply install updates from Prusa without re-adding the changes and recompiling the code.
Lucky for me, the I2C-bus can be accessed via G-Code M260 since firmware
version 6.1.2. So all that's needed is a few custom
G-code instructions in the slicer profile and the stack light is running!
Well, it works, but there is an important limitation: This approach can only update the stack light as part of normal print-file execution. So starting the print, finishing, waiting on color change, etc., can all lead to a stack light update.
However, aborting a print or pausing it manually from the printer interface cannot be caught and thus the stack light won't update in these cases. For me that's good enough, but I can imagine this isn't ideal when using stack lights for status indication in a larger print farm...
The slicer profile modifications to insert the custom G-code are again detailed on Printables.
Bonus: Stacklight Mounting
I don't know where to fit this, but here's one more useful tip for mounting stacklights: Because they are long and thin objects sticking out from a machine, stacklights are very prone to get knocked off. Especially during transport of a machine.
To mitigate this, I really like mounting solutions that use a magnetic base for the stacklight. This way nothing is destroyed when knocking over the stacklight. Also, you can easily take it off for transport or move it around so it is always in a spot where it can be seen best.
For example, WERMA has such a magnetic base as an accessory but you could also easily design something like this on your own.
